Gussy’s Hat Take 2

So I actually started another project before this one, but it isn’t completed yet…since I was waiting for some double pointed needles to arrive in the mail. So you’ll get to see two ribbed hats in the next couple of days.

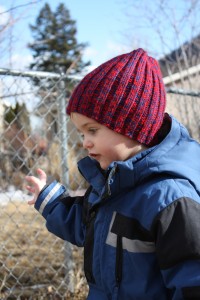
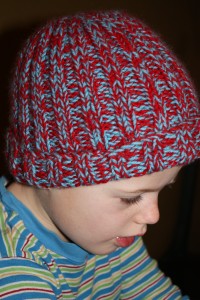
Since August’s first hat was a bit large, I decided I’d make him a hat just like Simon’s only I let him choose his own colors. So he pretty much chose the same colors – just a darker blue than Simon. We used the same wool – because it is pretty near perfect. And we actually got some for a friend for her birthday because it is just so great to work with and soft and yummy. Gussy's Hat Start

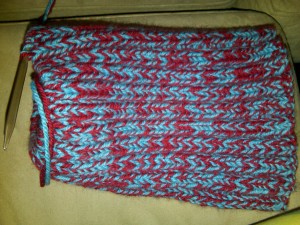
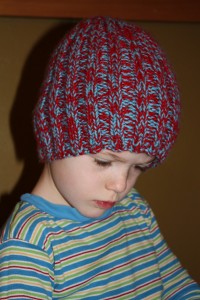
So here we are in the very beginning phase. I used the same size needles – size 8 circular needles. And of course switched to double pointed needles at the end (also size 8). I knitted two colors together (as one) again, just like I did with Simon’s hat. I just love the way Simon’s hat turned out, I know it is warm and cozy and covers his little ears and I wanted the same for Gussy. So – why mess with success right? The wool I used was Shepherd’s Wool Yarn made in Michigan. The colors Mr. August chose were Christmas Red (just like his big brother) and Cobalt Blue. Same pattern – knit 2, purl 2 all the way around. I cast on 80 stitches and the decreasing at the top was done the same way – I think? I knit 2 purled 2 until I had about 7 inches worth of hat then I decided to start decreasing. I decreased by purling my 2 purls together first and from then on just knit 2 together. I may have decreased more rapidly than I did with the first hat but it still turned out nice and tight at the top. I was debating putting a pom pom on top – but then maybe he wouldn’t love his hat until the end of time.

Gussy's 2nd Hat

He told me “Kank you so much for my hat Mama” this morning at the breakfast table. Such a sweet little peach. I could eat him right up. He’s been snuggling with it all day long.

Back View Ribbed Hat

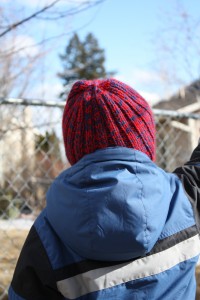
Here is my sweet little peach’s hat from behind. So you can sort of see the decreasing.

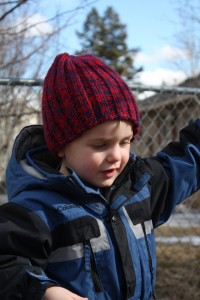
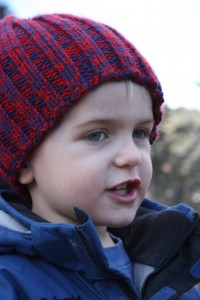
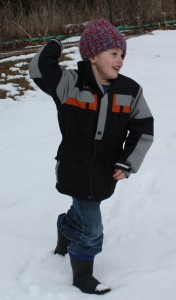
And just a couple more shots because I figured you couldn’t get enough of what a cutie cakes he is!

August Ribbed HatAnother August

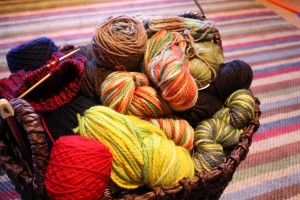
And finally I wanted to give you a taste of where my stash is at these days. Purl Soho had a sale so I got myself some new yarn, fun!

My Stash

Happy Knitting!

Here She Is!

Little Clara in her magical hat. Perfect fit. Perfect little angel baby. Sheesh I wish I could see your pretty little face in person!

Clara's Hat

So just in case you haven’t been following this was the ribbed  hat that I made a couple of posts back.

Dropped Stitch & Pretty Needle Holder

So when I was making August’s knitted roll hat, my first hat, I dropped a stitch and didn’t know what I would do. I was thinking I ought to just call it quits for the night and start again tomorrow, or possibly go into the yarn shop in town and see if they could help me. But, then I remembered that I could check on You Tube for some suggestions…so I did just that. The very first video that I went to did the trick, so I saved the link to share. It was so helpful that I think I’ve completely got it figured out now. So in hopes that I can reference this in the future and help some of you fellow knitters I wanted to share.

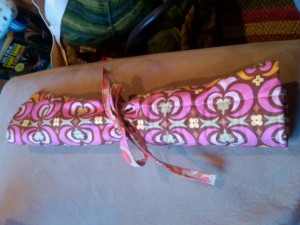
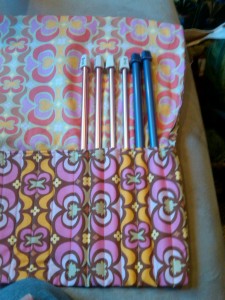
I also wanted to show off some kind of bad photos of something really sweet my sister made for me for Christmas. As a brand new knitter – I knew these ‘needle holders’ existed but I didn’t know what I wanted, so I asked her to make me one. She came up with this…

Needle Holder ClosedNeedle Holder Open

This treasure definitely serves its purpose, but if I could change a couple of things…I’d probably put some batting in the back and ‘how was a girl to know she’d soon have circular needles needing storage?’. Otherwise I don’t know what on earth I’d do without this gem. My sister that made this is this little sweetie. I’m sure she’d take orders and she’ll be revamping her pattern, she doesn’t knit so she needs some tips, and I didn’t have many to give at that point, but as my collection of needles, double pointed needles, crochet hooks, and circular needles grows I’ll be needing a companion holder.

Some other good knitting nooks I’ve been informed of since I started this fun endeavor are Ravelry, Knitting Help, and the Yarn Harlot. I’m sure there are so many more out there…and I’ll mention them as they come along. Ravelry is my fav, it is like Facebook for knitters and crocheters. I heart it!

Happy Knitting! Oh and don’t let dropping a stitch discourage you – you can forge through!

Another Ribbed Hat

Well the winter has brought inspiration for knitting but we’ve also been doing a lot of soaking at Hot Springs around Montana, so I haven’t been blogging a ton…here is something I just finished last week though. I was intending to make it for Mr. August (Gus – my 2.5 year old) but it ended up being a bit thinner than I’d like when stretched across his little head. So, we’re sending it to our sweet baby Clara, we thought she could use a little spring hat. You can see a sneak peek of her in the Checkerboard Scarf post.

Clara's Ribbed Hat

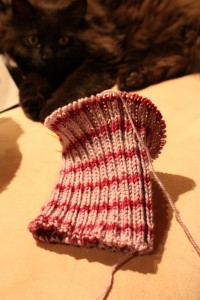
Here is the hat still under construction. I decided to make it ribbed again, I just really like the way they stretch. I ended up using some of my Skyline 100% Superwash Merino Wool – sport weight. It called for size 3-5 needles (which is good sock yarn (fingering yarn – I think that is correct?) but I’m not quite there yet) – I was told to attempt about 5 hats before I started on a pair of socks. I think my next project is actually going to be mittens though or maybe some leg warmers. I really heart leg warmers. I used size 6 circular needles to make this hat and finished it off with double pointed size 6 needles like usual. I cast on 80 stitches, but since I was using such tiny yarn and needles it ended up being a bit smaller than I’d anticipated. I just knit two, purled two the whole time. When I decreased I purled two together first, then I decreased two knits together and purled one in between. I finished completely by knitting two together until I could finish the top. This yarn also says to machine wash cold or hand wash, lay flat to dry – just FYI Nicole.

Ribbed Hat Stretch

I’ll be sure to post a photo of Clara adorning her hat as soon as I get one, in the meantime here is the hat stretched on Gussy’s little head.

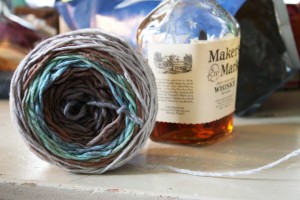
Just a little taste of what’s to come below. We went to Elkhorn Hot Springs this past weekend so I started another hat with some yarn that I got from Loopy. I’m really liking the Ribbed pattern, I sort of created, so I’m going to make a couple more ribbed hats. We enjoyed some tasty bourbon whilst knitting in our cozy cabin, of course this was after playing in the snow all day and soaking in the hot springs. I think this hat will be for me? We’ll see.

yarn and bourbon

Happy Knitting!

My Ribbed Hat

simonhat

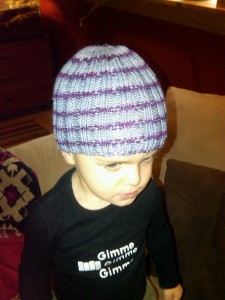
So I completed my number two hat a few nights ago. I promised my little 5 year old that he could wear his new hat to school on Thursday morning and luckily I was able to fulfill that promise.

ribbed hat simonribbed angleFolded

I gave him his hat at breakfast on Thursday morning. We decided we liked it best without the cuff at the bottom so he doesn’t wear it that way. He chose his very own yarn at Joseph’s Coat and he picked Shepherd’s Wool Yarn made in Michigan. He selected the two colors on his own Christmas Red and Misty Blue. I wasn’t super stoked about his colors because they were the colors from my high school and I didn’t want to knit a North High Husky hat, heh…but it ended up being pretty adorable. He told me, with much certainty, that he didn’t want stripes in his hat, he wanted the colors knitted and purled together, so I just held two pieces of yarn together. I’d done this with some scarves already so it wasn’t tricky. The yarn for this hat was Worsted Spun Fine Wool and I used size 8 circular needles and of course double pointed for the end/decreasing. Again I can’t remember how many I cast on and I didn’t use a pattern until the very end. This is just knit 2, purl 2 the entire way around over and over again to create this ribbed pattern. Really simple. I did have to do a little bit of research on how to decrease the top since this was only my second hat – I’m a rookie. I used this pattern to kind of figure things out.I just purled two together the whole way around the first round of decreasing and then knitted two together the next time around. Then just knitted two together the rest of the way around until I could close the top. It was actually really easy to do. I’m happy to have that under my belt though. I was worried about not being able to figure it out.

I love this wool – it is very soft and warm – Simon informed me that his head stayed warm at school on Thursday and Friday. It says to hand wash. But I really loved working with this yarn, I’m going back for more!

action simon

Happy Knitting * Look at that happy warm head.

My First Hat

Gussy's Hat

Yay I’m moving along! It isn’t a scarf! So this didn’t actually take me very long to knit up. I think I did it over the course of a few evenings (a few movies) and finished up on a weekend. The finishing was the hardest for me as I haven’t ever done anything major with decreases, etc. I didn’t have a pattern when I started but then ended up finding a knitted cap pattern which was very helpful for the decreases at the end. This was for my sweet little August. I let him choose his wool himself and then I added one extra stripe. This is also the first time I’ve switched colors while knitting. I have run out of yarn mid-project and had to start a new skein but this time it was all intentional (as I hope you can tell).
I found the pattern in a book that I checked out at the library (another great way to get free patterns).

Rolled Knit Cap

I used Patons Classic Wool for this particular project. It is a yarn that needs to be hand washed but is great for felting. The main color used was Cognac Heather. It said to knit it up using size 7 needles but I used size 6 circular needles for this project. It was my first time using circular needles and I love them! I wish you could finish the entire hat without switching to double pointed needles but it was a good first time experience for me. I guess most of you reading this probably know that you just knit the entire hat to make it roll this way, so no purling required. I think I started with 76 cast ons. I should write it down because I forget so easily. Since it was a gift for my little boy (who isn’t even 3) I figured that would be plenty, but if I had it to do all over again I would have done less. It is a bit big for him, I guess I could try lightly felting it to get it to shrink down…or just save it until he’s a bit bigger. I just don’t like that it doesn’t cover his ears very well…it doesn’t stay down over them. I’m actually making another hat right now but I’m using a ribbed stitch and it is going to be much better for ear coverage – that one is for Simon.

Stitch Markers

The upside to decreasing is I got to use my cute stitch markers from Skyline. I just knit two together before each of my stitch markers until I was done. It made a nice little star atop his cute little head.

One more photo of cute boots. He loves his new hat (almost as much as he loves to eat snow).

Gussy's Hat Front

Alpaca Wool Project

juliegrayscarf

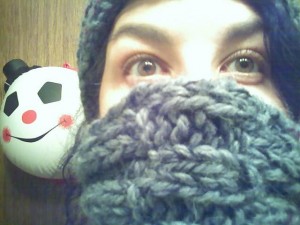
I’ve been dying to put this photo up…this is Julie…she got a special scarf from me for Christmas. It was pretty much my first time buying really amazing yarn. I used a beautifully soft alpaca wool charcoal colored yarn as well as a variegated yarn that was quite spendy (also wool) and didn’t come with quite as much. I somehow made it last through the entire scarf though and like usual kind of made up my own pattern. It is a checkerboard of sorts just longer pieces. It isn’t an incredibly long scarf but it fits around a neck no prob. It was a quick project as that alpaca wool was chunky. The exact name of the yarn is Misti Alpaca 100% Baby Alpaca – Made in Peru, I picked it up at Loopy and I really liked working with it. I actually used fairly large needles again. I chose size 15 needles for this project. I cannot find the label for the other yarn that I used, but it was really beautiful – not chunky – so the color is very subtle in the scarf. It added some reds, grays and a hint of black (which I think is probably Julie’s favorite color – at least that she wears often).

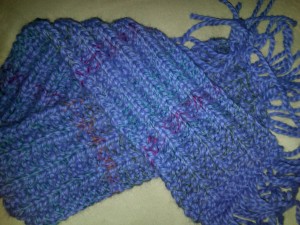
I actually made another scarf – that I still haven’t gifted but I used the same two kinds of wool just in different dye lots. I chose a lilac Misti Alpaca yarn and a variegated wool yarn on a very different color spectrum, springy colors. I really like the way it came out but I haven’t decided who to give it to just yet. I did a seeded rib stitch for the lilac scarf. The pattern was really simple – this is the first time I sort of used one. Row 1 (right side): Purl 1, *knit 3, purl 1; repeat from * to end. Row 2 (wrong side): Knit 2, purl 1, *knit 3, purl 1; repeat from * to last 2 stitches, knit 2. Repeat rows one and two for seeded rib. I guess I used a variation of this each time I made a ribbed scarf but just didn’t happen to be following a pattern any of the other times. I forgot until I unrolled the scarf just now that I put some fringe on the ends too. Ah knitting! How I love thee! Oh and I think I used those same size 15 needles? I can’t quite remember though. Oh and that beautiful yarn photo from the ‘Yarn Choices’ post was the variegated yarn I used in this second alpaca scarf.

lilac alpaca scarf

Happy Knitting!